Archive | Do-It-Yourself RSS feed for this section

Homemade Macarons

23 Feb

IMG_1805

Strawberry- Rhubarb Macarons

Macarons are a luxurious treat, therefore, obviously one of my favorite indulgences. But, a financially responsible lady cannot afford to purchase these yummy (but pricey) treats too often, as one macaron can range from $1.50- $4.00. And, as it’s impossible to eat only one, the expense can rack up!

So, what does a resourceful lady do? Well, she makes her own of course!

IMG_1827

Cinnamon- Maple Macarons

Although the process is quite a finicky and delicate one, it is incredibly satisfying. There are a few methods to making macarons (French and Italian) and testing these processes, inventing flavors and individually decorating is quite fun!

IMG_1829

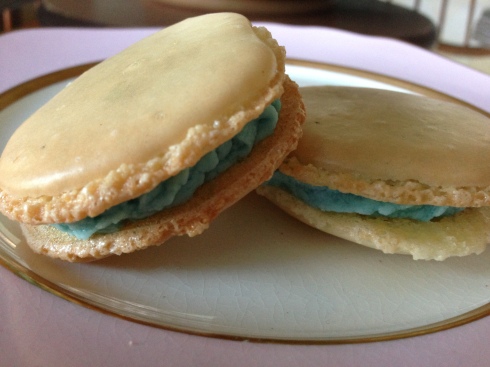
Very Vanilla Macarons (Blue color accent in honor of the birth of Prince George!)

Here is a step by step overview of the French method to making delicious macarons!

1. Assemble your ingredients. This is the recipe for a chocolate macaron with chocolate ganache. Depending on your recipe the ingredients will slightly vary but these are the staples.

Image

Macaron Shell:

– Powered Sugar

– Almond Meal/Flour

– Unsweetened Cocoa Powder

– Salt

– Egg Whites

– Cream of Tartar

– Granulated Sugar

Macaron Filling:

– Bittersweet Chocolate

– Heavy Cream

– Unsalted Butter

2. Combine powdered sugar, almond meal/flour, salt and cocoa powder in a food processor. Pulse the blade a few times to aerate and mix the ingredients. This will make the shell smooth and light.

Image

3. Sift the combined ingredients into a bowl. I often do this twice to ensure the dry particles are as small as possible to create the smoothest shell. Set aside.

Image

4. Fit your mixer with a wisk attachment. Place egg whites in the mixing bowl and beat on a medium setting until foamy. Add cream of tartar and continue to beat until egg whites become opaque and white. Slowly add in granulated sugar and beat until the egg whites hold stiff peaks.

Image

5. Using a spatula, fold the egg white mixture (meringue) into the dry ingredients. Fold until the meringue deflates and the consistency of the mixture mimics a cake batter.

Image

6. Transfer the batter from a pastry bag/ziplock bag onto a wax paper lined baking sheet and pipe out 1 inch rounds. The next instruction is very important. Hit the baking sheet against your work surface a couple of times. This will create the signature base or foot of the macarons. It will also rid the shell of air bubbles!

Image

7. Let the macarons sit for about 30 minutes. This will dry the macaron and ensure even baking.  Pop into the oven for  7 minutes at 350 degrees. Rotate baking sheet and bake for another 7 minutes.  Take out macaron shells and let cool completely.

IMG_1774

7. Create the ganache by chopping up the bittersweet chocolate and slowly mixing into a saucepan with heated cream. Take the mixture off of the heat for 1 minute and then add the butter. Mix until smooth and chill in the refrigerator for 30 minutes.

IMG_1772

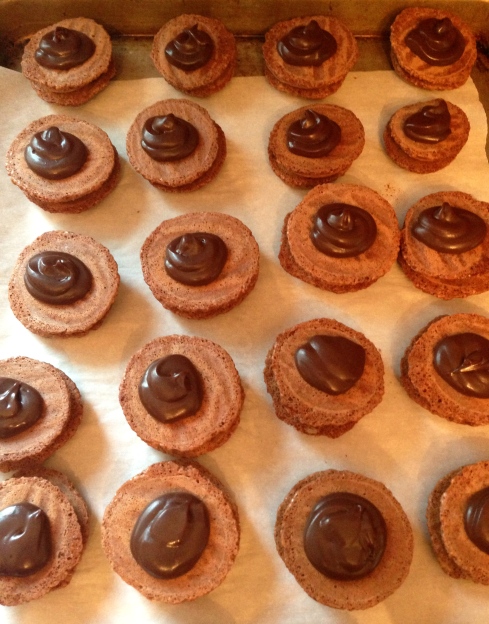
8. Take the chilled ganache and transfer into a piping/ziplock bag. Pipe a cherry-sized amount of ganache onto half the shells. The other half of the shells will be used to top the macaron.

IMG_1781

9. Match up same sized macaron shells, place together and put into the refrigerator for 24 hours (or sometimes a little less because I’m not very patient when it comes to deliciousness!)

10. Serve on a pretty platter, be impressed with yourself and enjoy!

IMG_1784

Chic Chain Bracelets

26 Jul

IMG_1744

Ladies love jewelry. That is that.

No matter one’s taste, every lady has a moment of, “oh my goodness, that is gorgeous, I must have it” when it comes to a particular piece. But often, that beautiful piece of jewelry does not justify purchasing, as other daily lady duties must be fulfilled (paying rent, student loans, saving for a little black dress…). In that case, a lady must resort to resourcefulness and creativity.

I have always loved the simple chain bracelets that go with any outfit, but did not want to spend some of the silly prices it costs to have them! Therefore, this independent lady decided to make her own.

All the materials can be found at local craft and hardware stores.IMG_1730

You will need:

1) About 1-2 feet of chain. There are many types of chain and choosing the right design for you is the fun part!

2)  Jump rings, which are circular metal pieces used to attach your chain to it’s clasps.

3) Clasps! This is another way personalize your bracelet as clasps come in all different shapes, sizes and designs.

4) Ribbon (Optional)IMG_1731

The proper tools are also important as to not scratch or damage your chain. You will need scissors and jewelry pliers/cutters. These can be bought in packs at your local craft shop!IMG_1732

Next, measure the chain around your wrist and mark where the chain is to be cut. Remember, you will be adding two jump rings and a clasp, therefore, include their length before cutting the chain too short or too long. IMG_1733

Cut the chain and add the jump rings to each end.IMG_1734

Then attach your clasp!IMG_1736

For a little extra fun, attach a ribbon through one of the jump rings and tie it into a bow. I have saved my Tiffany box ribbons and wanted to do something special with them, and what’s more special than to wear them beautifully?!

IMG_1745

Here is an example of how a different style chain and clasp can give a varied look!

And look how darn cute they look together…

IMG_1748IMG_1749


Teapot Lamp

4 Jul

Image

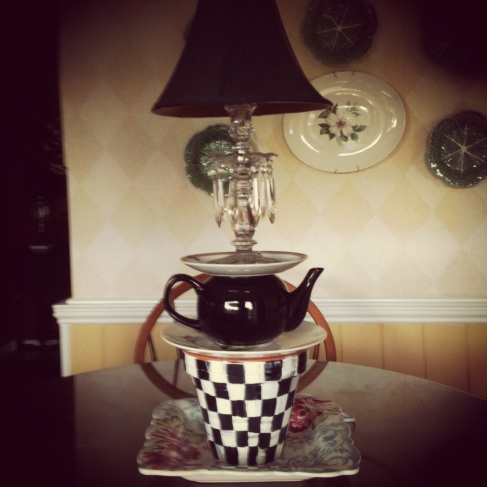
Nothing warms the heart more than an affordable, functional and beautiful statement piece to spruce up a room. This “Teapot” lamp, introduced to me by my mother was not only fun to make but also a wonderful lesson on how to wire a lamp!

All that is needed are a few vintage pieces of china, superglue and a lamp kit (found at any local hardware store).

1) Stack selected pieces and experiment with different arrangements and heights. The pieces can include plates, platters, candle holders, teapots, tiny bowls, etc.

2) Once the desired look is achieved, begin supergluing the pieces together beginning at the bottom. Let glue set.

3) Follow the directions on the back of the lamp kit and attach the neck of the socket into/onto one of your china pieces with superglue. Having a piece on the top of the lamp which will “house” the socket is ideal. A small bowl, teacup or candle holder is perfect. Experiment to see what works best, that’s the most exciting part!

4) Let the cord run down the back of the lamp.

5) Choose a lovely lamp shade to go on top and admire your handiwork!

Easy Lip Exfoliation

7 Mar

In these dry winter months, it is often hard to keep your skin, in particular your lips, smooth and soft. Not only so, but well groomed lips ensures that whomever you are talking to is focused on the intelligent words coming out of your mouth and not on your chapped lips!

This simple confidence boost takes about 8 mins and uses ingredients and materials you already have!

Step 1: Gather your materials. This includes a toothbrush (can be old or new), a cup, a spoon, petroleum jelly and sugar.Image

Step 2: Add two pinch fulls of sugar into the cup.Image

Step 3: Add about 3/4 of a spoonful of petroleum jelly into the cup.Image

Step 4: Mix the petroleum jelly and sugar together with the spoon and apply to your lips. Keep the mixture on your lips for 5-7 minutes.

Step 5: With small circular motions, use the toothbrush to rub the mixture into your lips. Make sure to apply a little pressure while brushing; the combination of the toothbrush’s bristles and the sugar are the exfoliating factors. Brush for about 30 seconds to 1 minute. Image

Step 6: Wipe off the excess mixture on your lips with a warm washcloth and apply chapstick or more petroleum jelly to moisturize. Then, marvel at your beautiful, healthy lips!Image

Now get out there and say something smart!

Knob Necklace Holder

11 Feb

Image

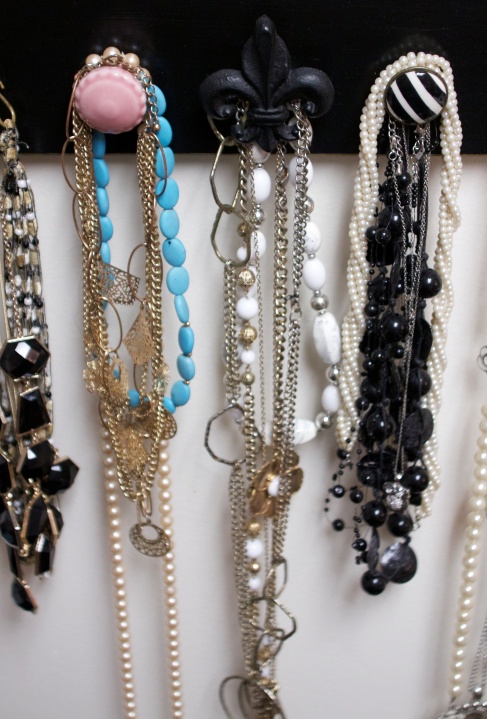
Over the summer, I was browsing through some knob pulls in a local craft store and found myself in a predicament. There were so many cute knobs and not enough things to put them on! Therefore, I gathered five of my favorite knobs in complimentary colors and patterns and decided to create my own necklace holder.

After a bit more browsing, I found a plain, wooden form that would serve as a great foundation for my project. I promptly painted the form black and added a bit of gold paint to emphasize the edging.

Then with the help of my dad, I created five equidistant holes across the middle of the wooden form. I popped in the pretty little knobs and voilà! A simple, pretty, and custom necklace holder!

Image

Depending on where you decide to place your necklace hanger, you may need to apply various attachments to the back of the wooden forms. Small, triangular picture hangers are great for this as well as 3M strips! You can also attach a simple ribbon to the back of the triangular hangers and place it upon a nail in the wall for a little extra prettiness.

Teacup and Saucer Jewelry Storage

7 Feb

A fun, cheap and pretty way to store your jewelry may simply be your cup of tea!

Image

Various vintage teacups and saucers make the ideal containers for your favorite pieces. Either tucked away in a drawer or displayed out in the open, your jewelry will always remain organized and beautifully presented!

Arrange the cups and saucers to your liking, alternating patterns and colors. Staying within a similar color palette will help bring the varied collection together. It is simple, easy, and a great way to use those often neglected pieces of china!

Modern Day Monogramming

7 Feb

The tradition of monogramming has been a unique form of customization for both men and women for quite some time. The classic look of three beautifully intertwined letters can spruce up any everyday object including one of a lady’s most important tools… her cellphone!

Image

I came across WhitSpeaks, a great blog with detailed instructions on how to create your own monogrammed wallpaper for your phone.

There’s nothing like seeing your initials prettily displayed as you open your phone… simply click on the link below, follow the directions and enjoy!

DIYMonogramWallpaper